DIY Pallet Planters: Easy Space-Saving Garden Ideas for Small Spaces
If you love gardening but don’t have much space, DIY pallet planters are the perfect solution. Whether you’re working with a small patio, balcony, or urban backyard, a pallet planter lets you grow herbs, flowers, or veggies vertically—saving space and adding charm to your outdoor area.
In this guide, I’ll show you exactly how to make your own DIY pallet planter, even if you’re a beginner.
Why Choose a Pallet Planter?
Pallet planters are one of the easiest and most budget-friendly garden projects. Here’s why they’re a great choice:
- Space-saving: Perfect for balconies, patios, and small gardens
- Eco-friendly: Upcycle old pallets and reduce waste
- Beginner-friendly: No advanced carpentry skills needed
- Versatile: Grow herbs, flowers, succulents, or leafy greens
- Portable: Move your garden around with ease
What You’ll Need
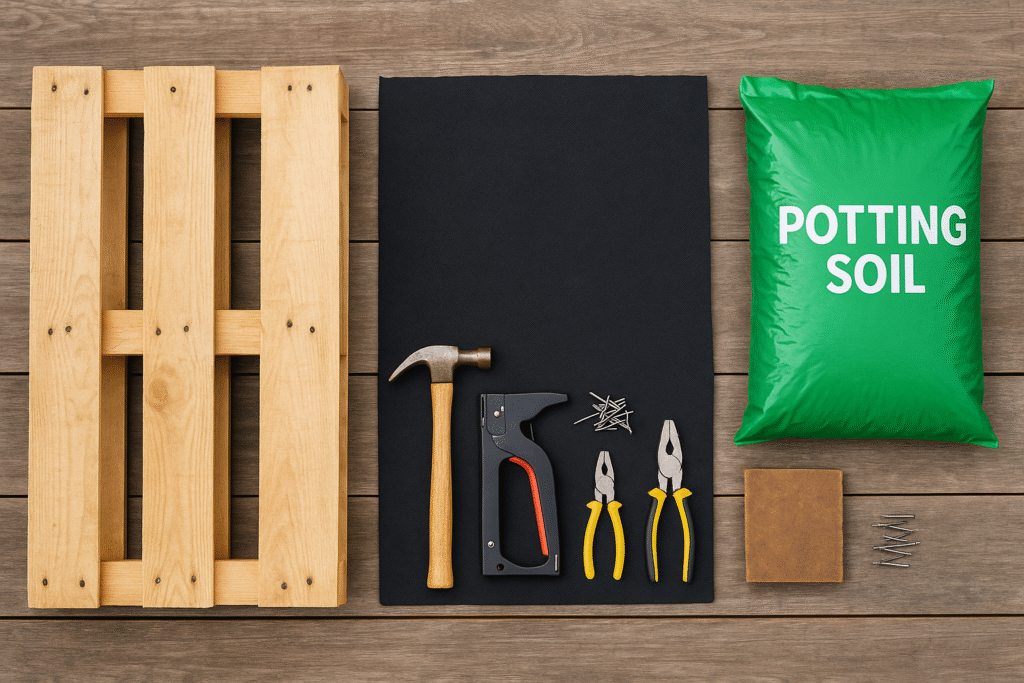
Materials:
- One wooden pallet (heat-treated, not chemically treated)
- Landscape fabric or burlap (for soil pockets)
- Staple gun and staples
- Potting soil
- Plants (herbs, flowers, succulents, or small vegetables)
- Optional: Sandpaper, paint, or wood stain for decorating
How to Build a DIY Pallet Planter (Step-by-Step)
Step 1: Choose the Right Pallet
Not all pallets are safe for gardening. Look for:
- HT stamp (heat-treated)—safe for plants
- Avoid pallets marked “MB” (methyl bromide-treated)—these contain chemicals
You can often find free pallets at garden centers, hardware stores, or recycling points.
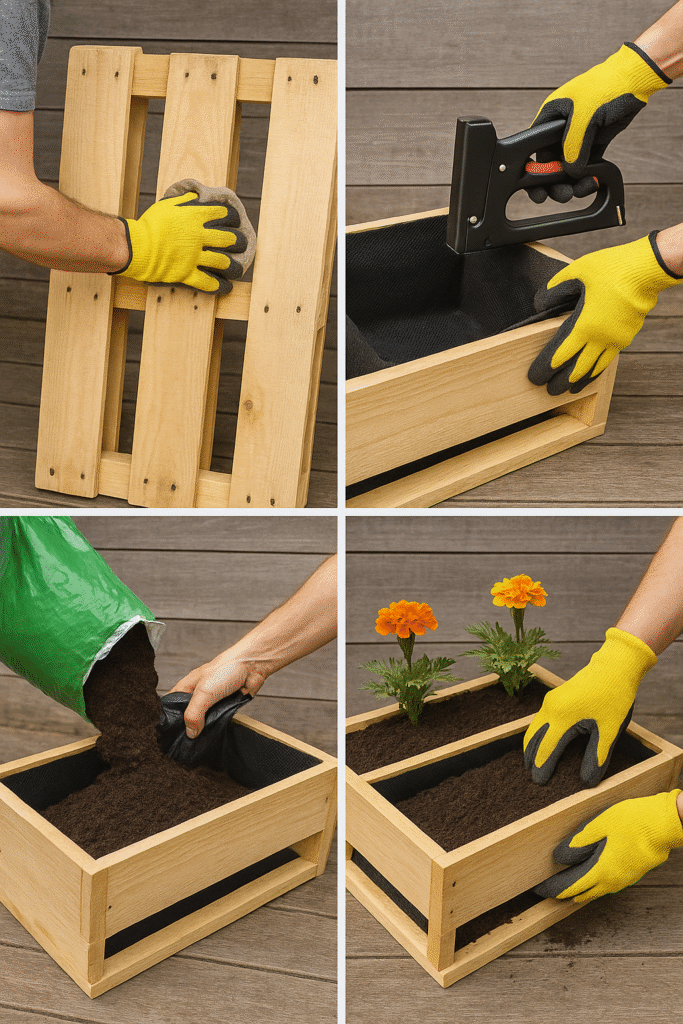
Step 2: Clean and Sand the Pallet
- Remove dirt, nails, or splinters
- Use sandpaper to smooth rough edges (especially important if you have kids or pets)
Step 3: Create the Planting Pockets
- Turn the pallet so the slats run horizontally
- Attach landscape fabric or burlap to the back, bottom, and sides of each row using a staple gun
- This forms little “pockets” that will hold the soil in place
Step 4: Fill with Potting Soil
- Tilt the pallet slightly upright
- Fill each pocket with potting soil, packing it down gently so it stays secure
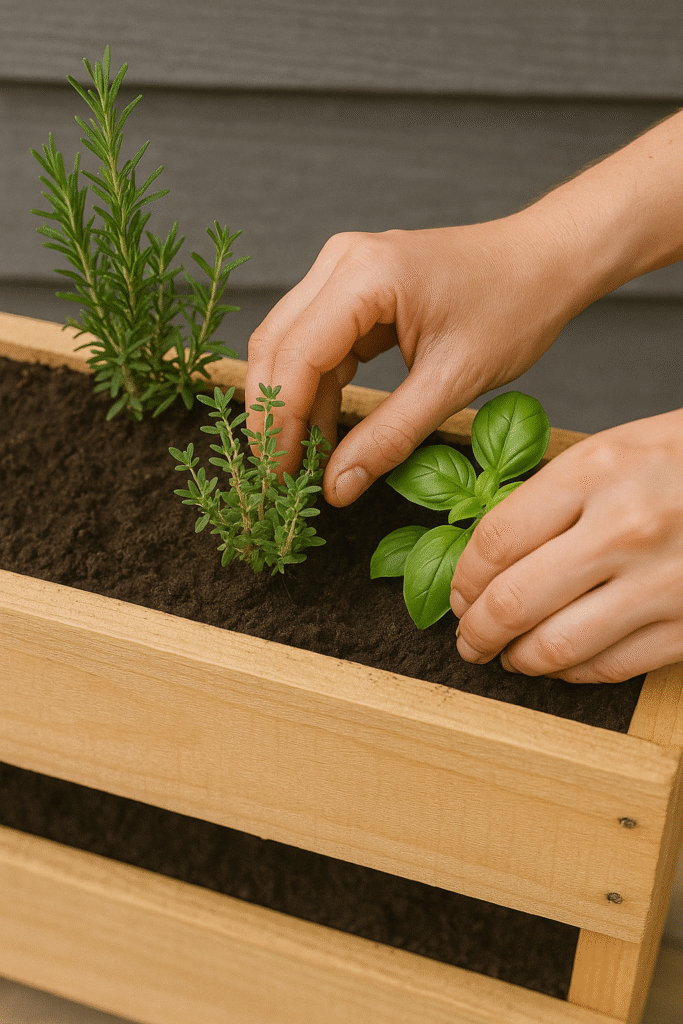
Step 5: Plant Your Garden
Choose plants based on your light and space:
- Top sections: Herbs like basil, parsley, or mint
- Middle sections: Flowers like petunias or marigolds
- Bottom sections: Trailing plants like ivy or creeping Jenny
Tuck the plants into the soil and water gently.
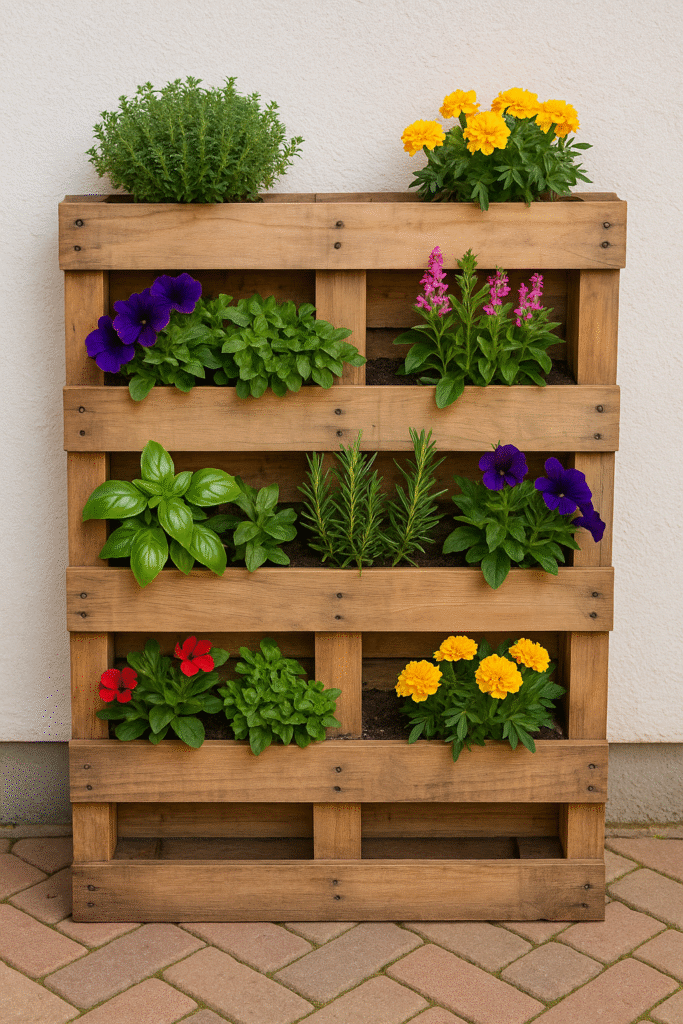
Step 6: Set Up and Enjoy
- Place your pallet planter vertically against a wall or fence
- Make sure it’s in a spot with the right sun exposure for your plants
- Water regularly, especially the top rows which dry out faster
Best Plants for Pallet Planters
Here are some pallet planter-friendly plants:
- Herbs: Basil, mint, thyme, oregano, chives
- Flowers: Pansies, petunias, nasturtiums, marigolds
- Leafy Greens: Lettuce, spinach, arugula
- Succulents: Great for dry, low-maintenance gardens
Creative Pallet Planter Ideas
Want to take your project to the next level? Try these fun ideas:
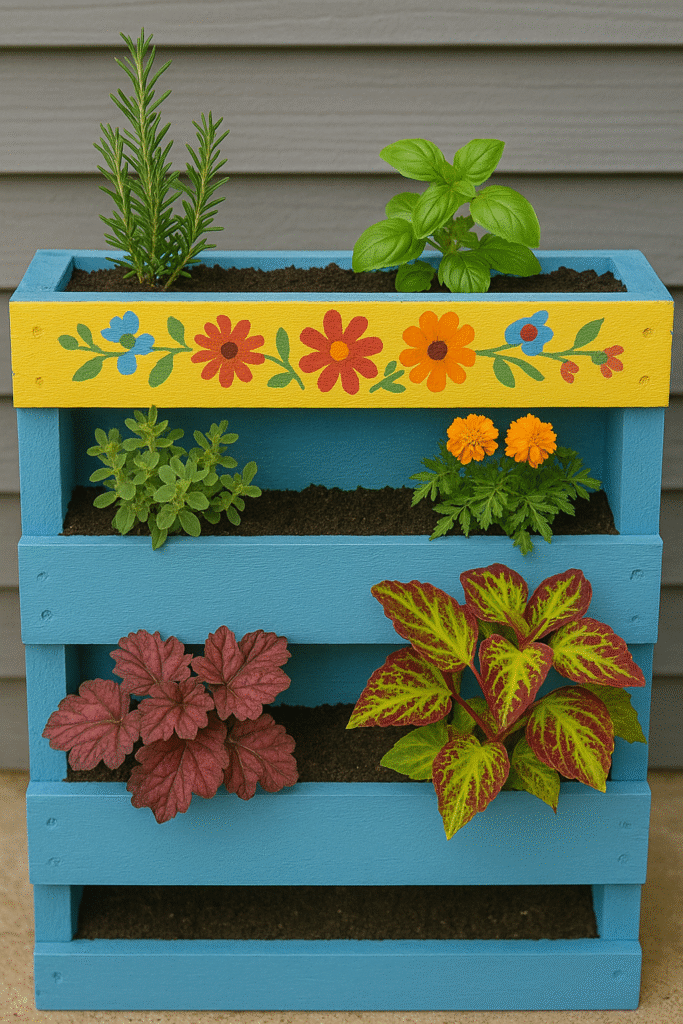
- Paint or stain the wood to match your outdoor decor
- Stencil plant names onto the slats for easy labeling
- Add hooks to the sides for hanging garden tools or decor
- Mix textures and colors by combining trailing plants with upright ones
Maintenance Tips
- Water regularly, especially during hot weather
- Replenish soil and compost between growing seasons
- Watch for pests since pallets are often placed near walls
- Check drainage to avoid water buildup at the bottom
Common Mistakes to Avoid
- Using chemically treated pallets: Always look for “HT” stamps, not “MB”
- Skipping drainage: Make sure excess water can drain to prevent root rot
- Overloading the pallet: Keep the plant and soil weight manageable
Conclusion
A DIY pallet planter is a simple, affordable way to grow more in less space. Whether you’re planting herbs, flowers, or greens, this vertical garden is perfect for balconies, patios, and tiny yards.
So grab a pallet, gather your supplies, and create your very own space-saving garden this weekend!