🌱 How to Build a DIY Raised Garden Bed: Step-by-Step Guide
Introduction
Looking to start your own garden but don’t know where to begin? A DIY raised garden bed is one of the easiest and most rewarding projects for beginner gardeners.
Raised beds give you better control over your soil, make weeding and maintenance easier, and can turn even a relatively small backyard or outdoor space into a productive garden.
The good news is that you don’t need advanced woodworking skills to build one. With a few wooden boards, screws, basic tools, and a suitable location, you can put together a simple raised garden bed that will work for vegetables, herbs, flowers, and even some fruits.
In this guide, I’ll take you through the process step by step, from choosing the right location and measuring your timber to assembling the frame, filling it with soil, and planting your first crops.
Disclosure: This post contains affiliate links. As an Amazon Associate I earn from qualifying purchases. If you purchase through these links, I may earn a commission at no additional cost to you.
What You’ll Need
Before you begin, gather your materials and tools. Having everything ready before you start makes the project much easier.
Materials
- 4 wooden planks
- Galvanized or exterior-grade screws
- Quality garden soil
- Compost
- Landscape fabric or plain cardboard (optional)
- Mulch (optional)
For a simple beginner project, a 4 ft × 4 ft raised bed is a convenient size. It is compact enough for many gardens while allowing you to reach most areas of the bed without stepping onto the soil.
For the sides, choose timber that is strong enough to hold the weight of wet soil. Naturally durable untreated timber can be a good choice, although the lifespan will depend on the species, climate, and how much moisture it is exposed to.
For assembly, use exterior-grade wood screws designed to tolerate outdoor conditions rather than ordinary interior screws, which may corrode more quickly.
Tools
You don’t need a workshop full of equipment. For a basic raised bed, the most useful tools are:
- Cordless drill or hammer
- Measuring tape
- Pencil
- Saw, if the timber isn’t already cut to size
- Spirit level
- Gardening or work gloves
If you’re assembling the bed with screws, a cordless drill makes the job considerably easier than driving every screw by hand.
For occasional home and garden DIY projects, you don’t necessarily need an expensive professional drill. A compact cordless model can be sufficient for straightforward jobs such as assembling planters and raised beds.
One beginner-friendly option to consider is the AVID POWER 20V Cordless Drill, which comes with a battery, charger, and a selection of bits.
Benefits of a Raised Garden Bed
Raised garden beds have become popular for good reason. They can make gardening easier while giving you more control over the growing conditions around your plants.
Better Soil Control
Instead of relying entirely on the existing soil in your yard, you can fill the bed with a suitable mixture of topsoil, compost, and other organic material.
This is particularly useful where the natural soil is compacted, poorly drained, or simply difficult to work with.
Improved Drainage
Because the growing area sits above the surrounding ground, excess water can often drain more effectively.
Good drainage is especially important for vegetables and herbs whose roots can suffer when soil remains waterlogged for extended periods.
Easier Maintenance
A raised bed can reduce the amount of bending required when planting, weeding, and harvesting, particularly if you build the sides higher.
The defined growing area also makes it easier to spot weeds and keep them under control.
Great for Small Spaces
You don’t need a huge backyard.
Raised beds can work in compact gardens, courtyards, and other areas where you want to create a clearly defined growing space.
Less Soil Compaction
Because you can reach plants from outside the bed, there is usually no reason to walk on the growing soil.
This helps maintain a looser soil structure that allows roots, air, and water to move through the bed more easily.
Step-by-Step Instructions
1. Choose the Location and Measure the Bed
Before cutting any timber, decide where your raised bed will go.
For vegetables and many herbs, choose an area that receives plenty of sunlight during the growing season. Observe the location during different parts of the day if you’re unsure how much direct sunlight it receives.
Also consider access to water. A bed located extremely far from your normal watering point can quickly become inconvenient.
Once you’ve selected the location, determine the dimensions.
A 4 ft × 4 ft bed is a good beginner-friendly option because you can generally reach toward the middle without having to step onto the growing area.
If you’re building a longer rectangular bed, keeping it approximately 3–4 ft wide makes plants easier to reach from either side.
Measure the timber carefully and mark your cuts with a pencil.
A simple rule is worth remembering here:
Measure twice, cut once.
It takes seconds to double-check a measurement but considerably longer to replace a board you’ve accidentally cut too short.
2. Cut the Wood
If you purchased timber that has already been cut to the dimensions you need, you can skip this step.
Otherwise, place each board securely on a stable work surface and cut along your measurements using an appropriate wood saw.
Try to keep the cuts as square as possible. Uneven cuts can make it harder to form neat corners when you assemble the frame.
Wear appropriate eye protection when cutting timber, and keep your hands clear of the cutting path.
3. Assemble the Frame
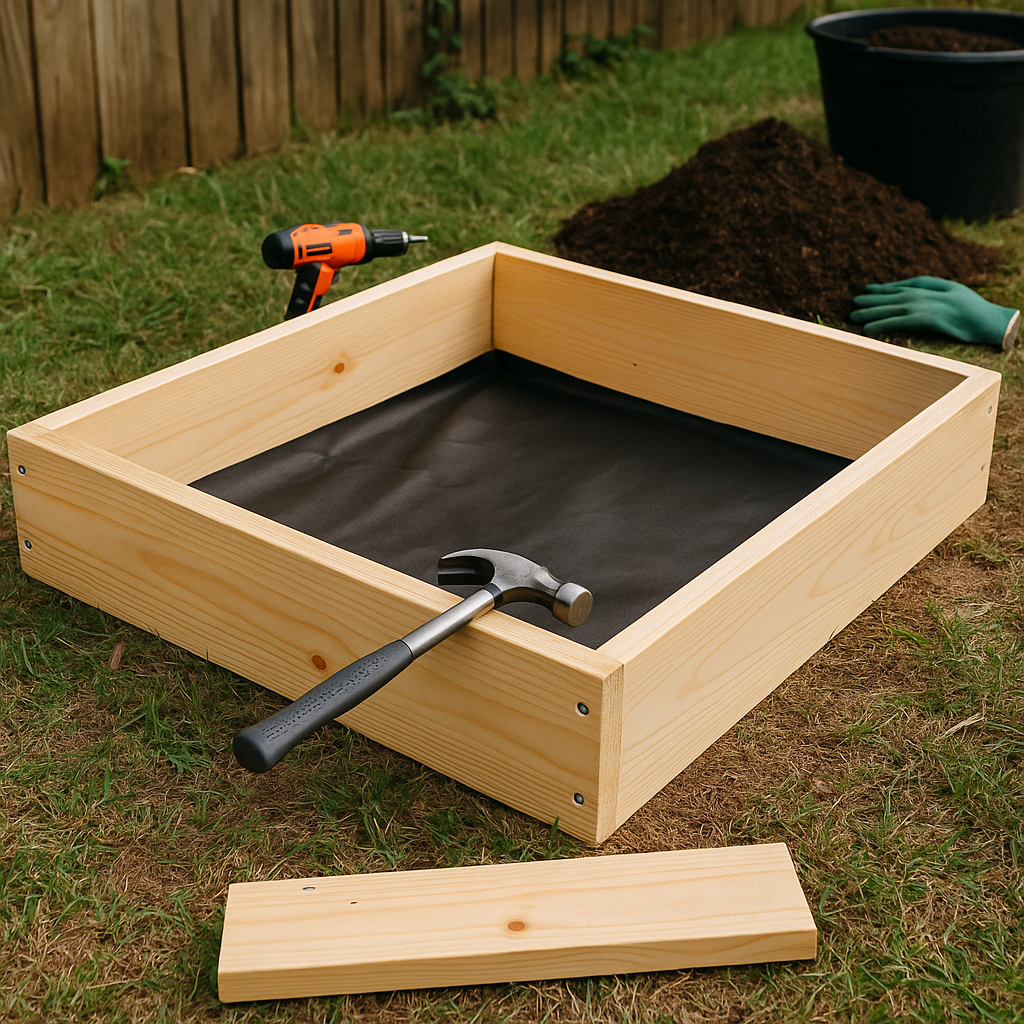
Lay your four boards on a relatively flat surface and arrange them into a rectangle or square.
Check that the corners line up correctly.
Using exterior-grade or galvanized screws, fasten the boards together at each corner. Drilling small pilot holes first can make assembly easier and may reduce the chance of the timber splitting, particularly near the ends of boards.
This is where a cordless drill becomes particularly useful.
Instead of manually driving every screw, you can drill the pilot holes and secure the frame much more efficiently.
If you don’t already own one, the AVID POWER 20V Cordless Drill mentioned above is one option to consider for light home and garden DIY projects.
You can also reinforce the inside corners with timber blocks if you are building a larger or deeper bed.
Once everything is connected, gently push the frame from different directions. It should feel reasonably rigid rather than loose at the corners.
4. Position and Level the Bed
Move the completed frame into its final location before filling it with soil.
This is important because once the bed contains soil and compost, moving it will become much more difficult.
Place a spirit level across the frame and check it in several directions.
The bed doesn’t need laboratory-level precision, but correcting a significant slope will help prevent water from continually collecting toward one end.
If one side is too low, add some soil underneath it. If one side is too high, remove a small amount of soil until the frame sits more evenly.
Also make sure the entire frame is stable and supported rather than rocking on uneven ground.
5. Prepare the Ground
What you put beneath the raised bed depends on where you’re installing it.
If you’re placing the bed directly over ordinary lawn, you can remove persistent weeds first and cover the grass with overlapping layers of plain cardboard before adding soil. The cardboard will gradually break down.
Landscape fabric is another option where weed suppression is particularly important, although it isn’t necessary for every raised-bed installation.
Avoid automatically creating a permanent barrier beneath a deep vegetable bed if you want plant roots and soil organisms to interact freely with the ground below.
For locations where landscape fabric makes sense, choose a permeable landscape fabric that allows water to drain.
6. Fill with Soil and Compost
Now comes one of the most important parts of the entire project: filling the bed.
Plants can only perform as well as the growing environment you provide for their roots.
Rather than filling the entire bed with poor-quality garden soil, aim for a fertile, well-draining mixture containing quality topsoil and organic matter such as finished compost.
Mixing compost into the soil provides organic matter and nutrients while helping improve soil structure.
Fill the bed gradually and spread the mixture evenly rather than dumping everything into one corner.
Leave a little space below the top edge of the boards. Filling soil completely to the top can cause it to wash over the sides during watering and heavy rain.
Remember that freshly filled soil may settle after watering, so you might need to top it up later.
7. Start Planting
Your raised bed is now ready for plants!
For your first bed, don’t feel pressured to grow everything at once. A few well-chosen crops are much easier to manage.
Beginner-friendly possibilities include:
- Lettuce
- Spinach
- Radishes
- Carrots
- Herbs
- Strawberries
- Cherry tomatoes
Choose plants according to your climate, season, bed depth, and available sunlight.
Also pay attention to spacing. Tiny seedlings can make an empty raised bed look as though there is plenty of room, but many plants become surprisingly large when mature.
Check the recommended spacing for each crop rather than packing seedlings tightly together.
8. Water Thoroughly
After planting, water the bed thoroughly so moisture reaches into the root zone.
Raised beds can sometimes dry out faster than surrounding ground, particularly during warm or windy weather, so check the soil regularly.
Rather than watering automatically according to a rigid schedule, feel the soil. If the upper layer is dry, check slightly deeper before deciding whether more water is necessary.
Watering deeply and appropriately encourages roots to explore a larger volume of soil.
9. Add Mulch
Once your plants are established, consider covering exposed soil with an appropriate organic mulch.
Mulching can help:
- Reduce moisture loss
- Suppress weeds
- Moderate soil temperature
- Reduce soil splash during watering
- Gradually add organic matter as some mulches decompose
Suitable materials vary depending on what is readily available in your area.
Don’t pile mulch tightly against plant stems. Leave a little breathing space around them.
Common Mistakes to Avoid
A raised bed is a straightforward project, but a few mistakes can create unnecessary problems.
Making the Bed Too Wide
If the bed is so wide that you have to step inside it to reach the centre, you’ll compact the soil you’re trying to keep loose.
For beds accessed from both sides, around 4 ft wide is generally convenient for many gardeners.
Choosing the Wrong Location
Building a beautiful raised bed in a heavily shaded location won’t help if you intend to grow sun-loving vegetables.
Choose the plants and location together.
Using Unsuitable Fasteners
Ordinary indoor screws may deteriorate when continually exposed to moisture.
Use fasteners suitable for exterior applications.
Assuming Untreated Wood Is Always a Mistake
Untreated timber isn’t automatically unsuitable for raised beds. Its durability depends greatly on the wood species and environmental conditions.
Naturally rot-resistant timber can last considerably longer than less durable species.
If you use treated timber, make sure the particular product is appropriate for your intended gardening application and follow relevant manufacturer guidance.
Building the Bed Too Shallow
Very shallow beds restrict the volume of improved soil available to plant roots.
A depth of around 6–12 inches can work for many common garden crops, while deeper-rooted plants may benefit from additional depth, especially where the soil beneath the bed is poor or inaccessible.
Forgetting Drainage
A raised bed shouldn’t function like a bathtub.
Avoid completely sealing the bottom unless you’re deliberately constructing a specialized planter with an appropriate drainage system.
Overfilling the Bed
Leave some space between the soil surface and the top of the boards.
This makes watering and mulching much easier.
Additional Tips for Beginners
Wear Gloves When Handling Rough Timber
Wooden boards can produce splinters, and moving soil and compost can be rough on your hands.
A reasonably sturdy pair of gardening or work gloves is useful during both construction and ongoing garden maintenance.
Start Small
One successful raised bed is better than building five beds and discovering that maintaining all of them takes more time than expected.
Start with one, learn how much watering and maintenance your plants require, and expand later.
Grow What You Actually Eat
It’s tempting to choose plants simply because they’re easy to grow.
But if nobody in your household likes eating them, you’ll eventually wonder why you’re dedicating valuable garden space to them.
Choose a mixture of easy crops and vegetables or herbs you genuinely use.
Don’t Forget Compost
Your first soil mixture isn’t permanent.
Plants remove nutrients as they grow, while organic matter continually decomposes. Adding finished compost periodically can help maintain soil condition and fertility over subsequent growing seasons.
Rotate Crops
If you use the same raised bed season after season, avoid repeatedly growing the same crop family in exactly the same place where practical.
Changing crops can help diversify nutrient demands and may reduce the buildup of certain crop-specific pests and diseases.
How Much Does a DIY Raised Garden Bed Cost?
The cost can vary considerably depending on the timber, dimensions, soil, and tools you already own.
If you already have a drill, saw, measuring tape, and basic gardening equipment, your main expenses may simply be timber, screws, soil, and compost.
Buying every tool specifically for one raised bed will obviously increase the initial cost, but reusable tools such as a drill, measuring tape, saw, and gloves can be used for many future home and garden projects.
One of the easiest ways to control costs is to design the bed around readily available timber sizes. This can reduce both waste and the number of cuts you need to make.
How Long Does a Wooden Raised Garden Bed Last?
There isn’t one universal lifespan.
How long the frame lasts depends on factors including:
- Timber species
- Board thickness
- Climate
- Soil moisture
- Drainage
- Construction quality
- Whether the wood has appropriate protection
Because the inside face of the timber remains close to moist soil, raised-bed boards naturally experience demanding conditions.
Inspect the frame occasionally, particularly around the corners and near ground level. Individual boards can often be replaced later without rebuilding the entire garden.
Is Building Your Own Raised Bed Worth It?
For many gardeners, yes.
Building it yourself allows you to choose the dimensions, materials, location, and soil mixture rather than adapting your garden around a pre-made planter.
It’s also an approachable first DIY project because the basic structure is simple: four sides securely joined together and positioned on a suitable site.
Once you’ve built the first one, constructing another becomes considerably easier.
Conclusion
Building a DIY raised garden bed doesn’t require advanced woodworking skills or an enormous backyard.
Start with a manageable size, choose a suitable sunny location, measure your timber carefully, assemble a strong frame with outdoor-appropriate fasteners, and pay particular attention to the quality and drainage of the soil you put inside it.
The result is a defined growing space that can make planting, weeding, watering, and harvesting easier while giving you greater control over your garden soil.
Most importantly, don’t worry about making your first raised bed perfect. Gardening is an ongoing process, and you can improve the bed, soil, and planting arrangement as you gain experience.
Ready for your next project? Check out our Balcony Gardening for Beginners: How to Start Small and Grow Big guide for more ideas on making productive use of limited outdoor space.
If you try this project, feel free to share your experience in the comments. I’d love to hear what you decided to grow!
One Comment