How to Make a Simple DIY Compost Bin for Your Garden (Step-by-Step)
🌱 Introduction
Want to turn your kitchen scraps into garden gold?
Building a DIY compost bin is one of the easiest ways to recycle organic waste and nourish your plants naturally.
Whether you’re gardening in a backyard or on a balcony, composting helps reduce waste, save money, and create a sustainable gardening routine. It also pairs perfectly with growing your own vegetables in containers. In this step-by-step guide, you’ll learn how to make a simple compost bin using inexpensive materials—no fancy tools or carpentry skills required!
🌼 Why Build Your Own Compost Bin?
Making your own compost bin has many advantages:
- Saves money – no need to buy a commercial composter
- Customizable – build a size and shape that fits your space
- Eco-friendly – reduces landfill waste and greenhouse gases
- Produces rich, organic fertilizer – perfect for enriching your indoor plants naturally
🧰 What You’ll Need
You probably already have most of these at home. If not, here are basic tools every beginner should have:
- A large plastic bin with lid, wooden crate, or old trash can
- Drill (for airflow holes)
- Optional: mesh screen, hinges, or handles
- Gloves
- Compost starter (or a handful of garden soil, dry leaves, or shredded newspaper)
🔧 Step-by-Step: How to Make a DIY Compost Bin
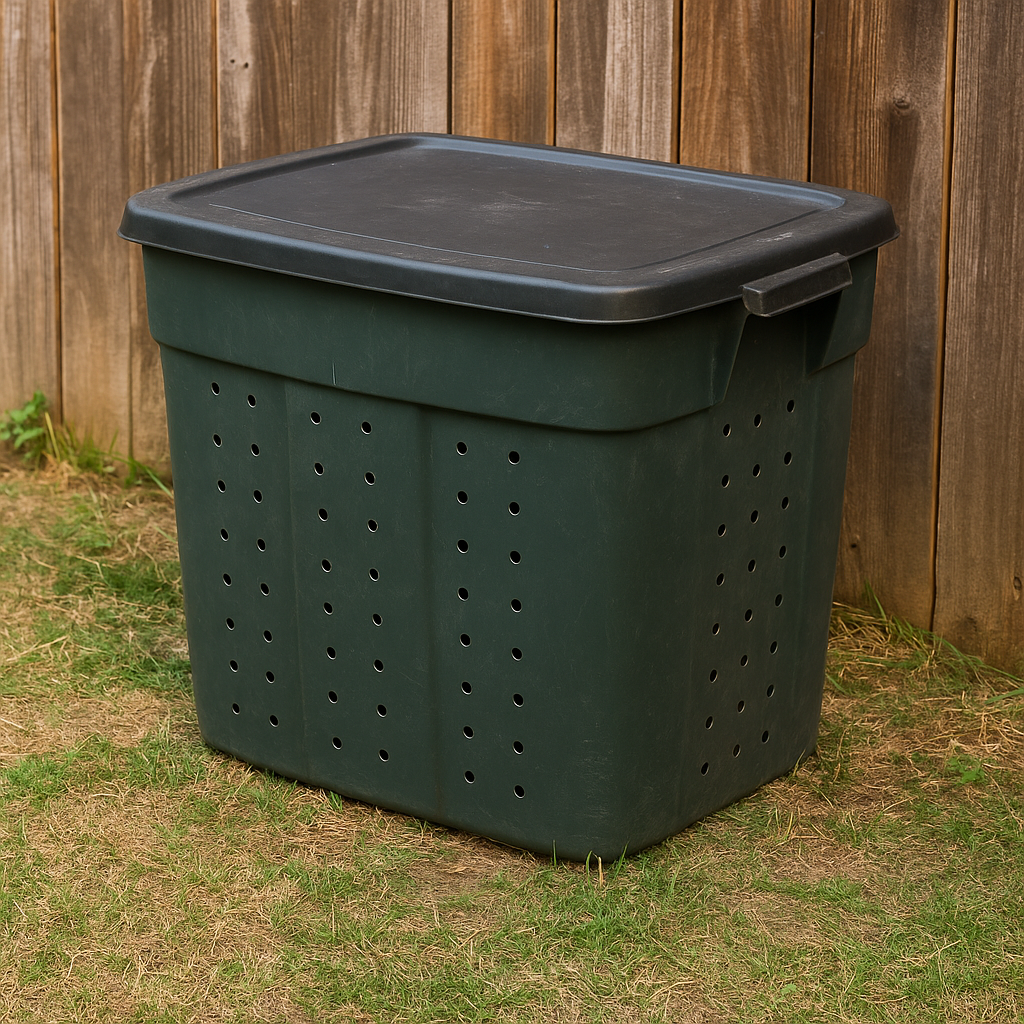
🪛 Step 1: Choose a Suitable Container
Pick a bin that’s at least 18 gallons (70L) if you have a garden. For balconies, smaller bins work too. It must have a lid and should be made of durable material (like plastic or wood).
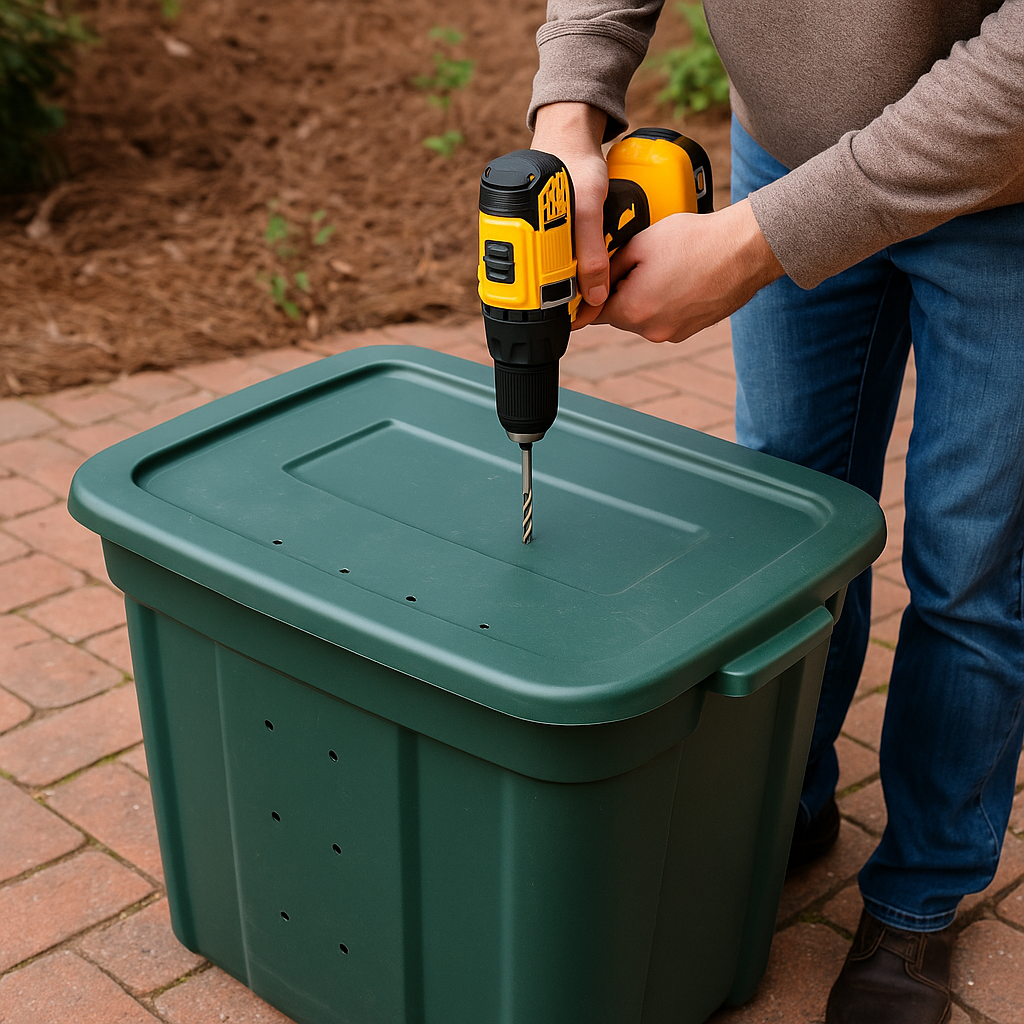
🧱 Step 2: Drill Holes for Ventilation
Use a drill to make small holes on the sides, base, and lid of the container. This ensures proper airflow, which is essential to prevent foul smells and help microorganisms thrive.
🔩 Step 3: Add a Lid or Cover
If using a bin without a lid, attach one with hinges or use a breathable cloth to loosely cover the opening. This keeps pests out and moisture in.
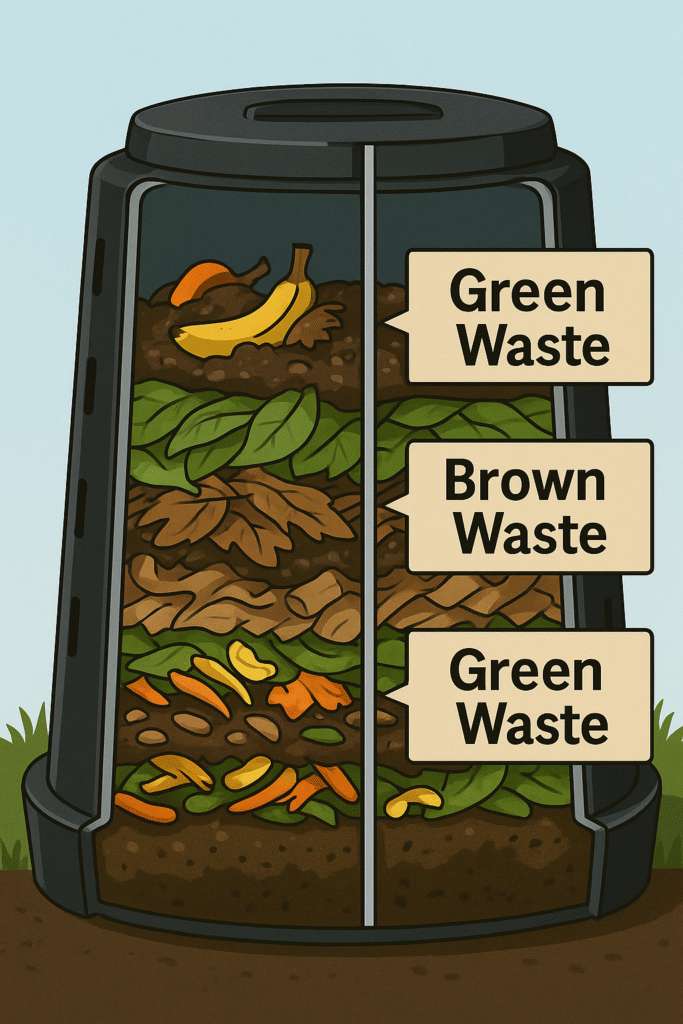
🌿 Step 4: Add Your First Compost Layers
Start by alternating layers of greens and browns:
- Greens (Nitrogen-rich): veggie scraps, fruit peels, coffee grounds
- Browns (Carbon-rich): dry leaves, shredded paper, cardboard
Top it off with a sprinkle of garden soil to introduce beneficial microbes.
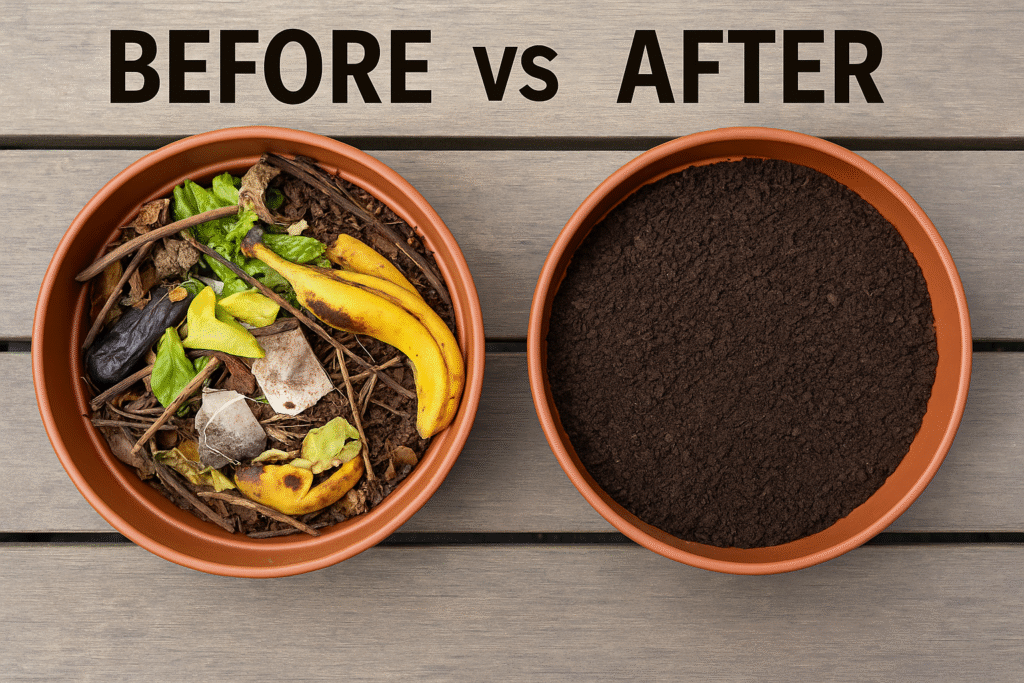
🌀 Step 5: Maintain and Mix
Every few days, stir your compost using a stick or hand shovel. Add water if it’s too dry, or extra browns if it’s too wet.
You’ll know it’s working when:
- It heats up inside
- The smell is earthy, not sour
- Scraps break down into dark, crumbly material within 1–3 months
🚫 What to Compost (And What to Avoid)
| ✅ Compost These | ❌ Avoid These |
|---|---|
| Fruit & veggie scraps | Meat, fish, dairy |
| Coffee grounds & tea bags | Oily or greasy foods |
| Eggshells | Pet waste or plastic |
| Dry leaves & paper | Diseased plants |
| Grass clippings | Charcoal or coal ash |
🧠 Common Composting Mistakes
- No ventilation: Compost turns soggy and smelly
- Too much wet waste: Balance greens with enough browns
- Overfilling: Leave space to stir and allow airflow
- Neglecting it: Stir regularly to avoid pests and slow breakdown
⚡ Tips for Fast, Smell-Free Compost
- Chop scraps into smaller pieces
- Keep a 2:1 brown-to-green ratio
- Cover fresh kitchen waste with dry material
- Store in a shady but warm area
- Add crushed eggshells for extra calcium
🌾 Final Thoughts
Building your own compost bin is easier than you might think—and the rewards are big. You’ll waste less, grow healthier plants, and contribute to a more sustainable lifestyle.
It also pairs well with projects like sMaximise Your Small Balcony: Space-Saving Gardening Ideas That Actually Worktarting a herb garden on your balcony.
👉 Have you started composting yet? Share your DIY setup or ask questions in the comments below!
One Comment